DIY Refurbished Paint

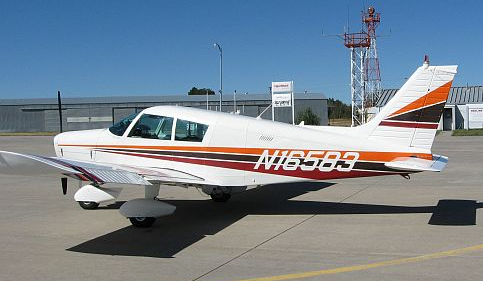
From this 1987 Imron paint
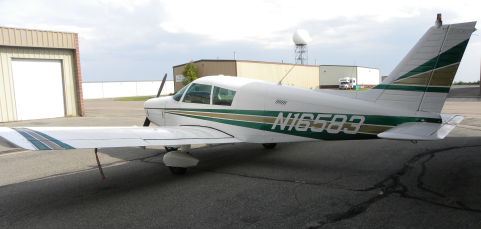
to this 2018 Imron single stage paint for less than $600!
From looking the 1987 paint job in thge first picture above, you would think the plane looks pretty darn good the way it sits and looks, and it does (after compounding and waxing with a buffer) Reality says a different story. The white Imron is somewhat faded but not too bad with some nicks here and there and it should since we are talking 31 years since N16583 had any kind of paint work performed.
This plane was purchased 2003 and even then the paint was so-so, but what flipped the paint switch occurred after a two year airframe refurb / overhaul of the airframe that started in 2003 - (any corrosion, all new interior, all service letters complied with, under rear seat strip and zinc chromate - copper battery cables, control cables, wing tip strobes, new wingtips, new cylinders, new mags, prop overhaul, and the list is very long including all 1/4 inch glass). When flying the plane I could feel flutter in the ailerons at maneuvering speed (129 mph) and sat often finger tapping my head saying "What the hell"(yes cable tensions were correct and even, with no loose hardware or hinges). So, out of the blue one day I decided to run my pinky fingernail down the leading edges of the wings and slightly above as well and as I continued this backyard type of troubleshooting something did not feel right as there was a certain amount of roughness which was irregular (should feel smooth and slicker than tap dancing shoes on a sheet of ice).
The procedure was the same procedure across the ailerons and sure enough the roughness was there - kinda like super fine sandpaper (wet sanding paper). Then, the light bulb lit up like a strobe flash in your eyes - PARASITIC DRAG! Porosity (age and sun from 2000 thru 2003 in Arizona- no hanger) - in the paint causing the parasitic drag and irregular air flows over the control surfaces. I sat there just shaking my head at the time and knew my work was cut out for me.
The first step was to completely wash the plane - no oil or grease residue and then compound out the whole and complete aircraft with #1 compound using a small buffer. You do whatever it takes to get the whole aircraft completely compounded. Then, wipe off. The next step is to use your favorite wax on - wax off.
(I used a buffer)( I also used Nu Finish). Do it once, then do it again. Wax on - wax off the whole and complete aircraft. You only need to compound once, wax on - wax off once a year. WALLA - NO MORE FLUTTER. The porosity was cured, and now smooth airflow over the entire aircraft.
As the years passed on, I finally pulled the trigger to change the colors on N16583 since it would match the interior and the orange, brown, and maroon was becoming somewhat faded anyway. My steps to a refurb paint job below:
(Ground aircraft for static)
1) Wash aircraft complete
removing all wax, oil, and grease residue.
(GROUND
AIRCRAFT - STATIC)
2) Using FROG TAPE, tape off all
area that you do not want painted (white paint).
I used two different colors, Jade and Gold so I my
tape off was in two stages. I taped off everything
for the jade first, then taped off everything for
the gold last.
3) Used a #180 grit buffing or
compound ball (Harbor Freight) to scuff the
paint that I was going to paint over, then wiped
clean with acetone. Same procedure was used for the
gold paint well.
(Imron
is a
polyurethane
coating which blends together to form that glass
look)
4) Purchased single stage Imron
Peterbuilt Jade and single stage Imron Peterbuilt
Gold mixing 3 parts paint to one part Imron hardner
(194S)
.
5) Applied two coats each, let
dry for about 12 hours before pulling tape.
6) After paint was applied, wax
on - wax off.
7) The only areas that required
some primer were very three small areas that had
surface corrosion between the vertical tail and
empanage which was removed, primered, and repainted
white
Bill of Materials:
3M Hand-Masker 12 ft. x 400 ft.
x 0.31 mil Painter's Plastic Brown Builder Paper (3 rolls) Frog Tape - fine edging
Regular paint masking tape for
masking - paper/plastic together
Acetone - 2 gallons
180 grit roughing ball - Harbor
Freight
Electric or DeWalt drill (battery) -
roughing ball
Clean cloth rags (diapers work
great)
HLVP Gravity Paint Sprayer with
pressure gauge (15-20psig)
Imron Elite Axalta Peterbuilt
Metallic Jade (singel stage)
Imron Elite Axalta Peterbuilt
Metallic Gold (single stage)
Imron Low APS Activator - 194S
Mix 3 parts paint to 1 part
activator
Respirator - DO NOT SKIMP HERE
(Imrom activator is very toxic)
Paint purchased through
FinishMaster
Click here for paint pic photo gallery slideshow!